Ahhhh, the whiteboard: the cornerstone of most classrooms and an essential need for self organization. Even though I’m focused on using new technology within my instruction, I still need that old school touch when creating my online flipped lessons or instructional videos. So when designing my home office/laboratory/studio over the summer, I felt the need to have a massive whiteboard to stay organized and assist with my instructional lessons. The whiteboard would also help plan research ideas and strategies. The issue I encountered when researching the potential of adding a whiteboard was the cost. A standard 6×4 whiteboard starts at around $300, a price I was unwilling to pay.
Being a young educator in today’s world usually means having to look for shortcuts or workarounds when trying to implement new ideas or technology- mostly due to the lack of dolla dolla bills, y’all. Well, I found a shortcut and it worked out pretty well. Using an adhesive-dry erase paint, I was able to create a customizable whiteboard for my home office for under $50. Here’s how:
STEP ONE: BUY STUFF
Materials Used:
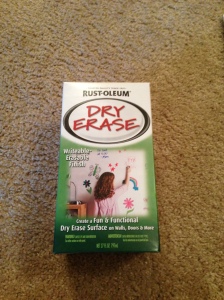
- The paint: Rust-Oleum Dry Erase Paint. They also make Chalkboard Paint, too, if you really want to go old school!
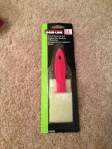
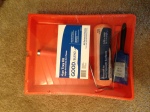
- Paint Supplies: Brushes, Rollers, Paint Tray, Sand Paper, Painting Tape, Plastic Drop Cloth


NOTE: Some whiteboard adhesive paint can be costly. At Lowe’s, the only option they had was a can of adhesive-dry erase paint for around $120.00. I found this above product at Home Depot for around $20: Link
As for the painting materials, try to get a “high density” paint roller to paint with. The higher the density, the smoother the surface will be. You obviously need a smooth surface to write on! Smaller brushes can be used to paint the edges and trouble areas for your surface.
Total cost of all materials was around $50.
STEP TWO: PLAN STUFF
Before you get painting, you need to plan out your surface. Here are the instructions from the Rust-Oleum paint:

These instructions were pretty spot on. I ran into some dry wall issues with my painting where you can see spots of “bad” drywall or a drywall repair job (see below). These could have been worked out better by sanding the surface more.
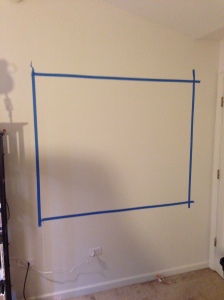
Note: For my whiteboard, I wanted it to be 6×5. Below is the planned outline of my whiteboard before the paint went on. One can of Rust-Oleum Dry Erase Paint can create a 7×7 surface.
Once you have the surface prepped for painting and your outline is created, it’s time to paint.
STEP THREE: PAINT STUFF
This type of adhesive paint called for two coats and a three day waiting period before applying the dry erase markers. Painting took around an hour to do, including the mandatory 30 minutes in between coats.
First coat of paint going on:
Note: Notice the two drywall issues in the upper/mid right corner.
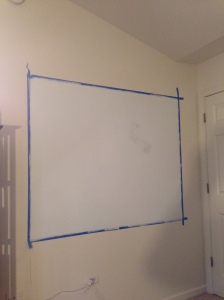
After the second coat and waiting three days, here is the final product:

That’s how you do it! Three easy-to-do steps, 2 hours of work, and all for under $50! A cheap and easy way to add a whiteboard to your classroom, office, home, etc. Basically, if you can paint the surface, you can turn it into a whiteboard!
If you have any questions or further ideas on this concept, please let me know! I’m currently conceptualizing ideas and strategies for using this paint for educational purposes for our department at Lewis University. More to come on that later!
